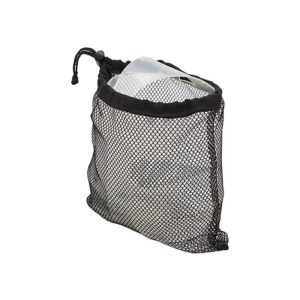
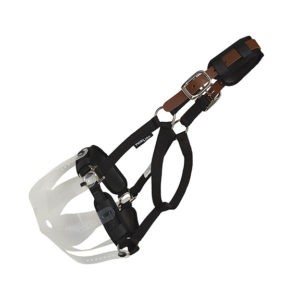
What is included in the Flexible Filly slow feed grazing muzzle package:
- Muzzle.
- Pack of bread ties for temporarily fitting muzzle.
- Pack of low profile zip ties with a few spares for permanent fitting.
What you will need:
- Halter: We recommend you commit a dedicated, well-fitting breakaway turnout halter with a fairly sturdy noseband to your muzzle.
- Time: It generally takes about 10 minutes to get everything fitted the first time you apply a Flexible Filly Muzzle. Subsequent muzzles will take about 3 minutes.
- To save even more time, be sure to check out the Flexible Filly Muzzle Turn Out Halter, designed for use with this muzzle.
How to Begin: Unpack your new muzzle. Fit your halter to your horse.
How to orient the muzzle:
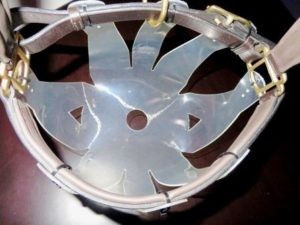
Two of the “fins” have a triangle cut out. These attach to the square (side) rings on your turnout halter and should be fastened one or two holes shorter than the front and rear sets of fins. Three front fins will connect to the nose-band, one in the center, the other two fall naturally to the sides of the center. Three rear fins will connect to the chin band. Connect one in the center of the chin band (do not use the ring). The other two connect naturally to the sides of the center.
Securing the muzzle:
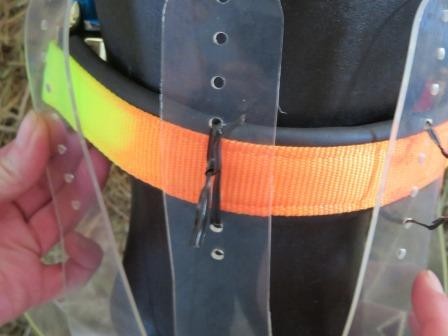
Secure each fin by inserting the cable tie through one hole, up around the nose-band then through a second hole. When attached to a halter with a sturdy noseband, properly fitted with the excess fin material trimmed close and cable ties pulled snug, the muzzle will not rub. Please do not wrap the fins around the halter. After finding the best fit for your horse, simply trim the excess fin material just above the top hole being used. The “keeper” on the cable tie is on the outside of the muzzle and the excess is facing down and trimmed close. You will receive extra cable ties so you will have a few spare ones.
Use the enclosed paper ties as a temporary tool to affix the square ring to the Flexible Filly by placing the selected hole slightly underneath the bottom of the ring. Then tie the paper tie around the ring using the hole above. Repeat this process for all 7 other fins, keeping the selected hole below the part you are affixing it to and using the next open hole above it to tie the paper ties together. This allows you to easily adjust the fit before securing with the permanent cable ties. Once you are satisfied you have the correct holes aligned to the halter please remove the paper ties or string and permanently secure the muzzle with the included cable ties.
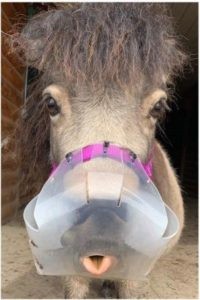
When properly installed, the muzzle should be close to your horse’s lips. If the muzzle is touching the nose simply make the fins under the chin longer, this will lift the muzzle away from the nose. The muzzle should be less than one finger distance from their lips – see the silly pony, is it close enough to stick a tongue through?
How to Enlarge the Grazing Hole:
TIPS:
- If the horse is eating out of the sides (not using the center hole). This is usually an indication the horse cannot get enough grass through the center grazing hole. Check that the grazing hole is indeed positioned correctly beneath your horse’s mouth. Consider making the grazing hole larger; your muzzle comes with the smallest hole size. Lower your halter’s noseband and raise the muzzle so that it is attached using the lower holes. It can be very close, even lightly touching your horse’s lips. When your horse’s head is down grazing, the muzzle will be further away from the nose and lips. Double-check that the front and rear fins are all on the same hole and that the side fins are 1-2, even 3 holes shorter than the front and back fins. If the problem persists, move the back two size fins closer to the square rings and pull the zip ties snug. If those adjustments are made, and your horse is still eating out of the side, you need a smaller muzzle.
- Breaking Zip Ties. The enclosed zip ties are designed to break before the muzzle tears. We feel the safety of the horse comes first, the longevity of the product second, and the hassle of finding a muzzle third. If you want to ensure the cable ties will not break, you may purchase stronger zip ties or double up. Please be advised when increasing the strength of the cable ties, tearing of the muzzle is not warranted.
- Don’t forget you can also shorten and lengthen the fit by adjusting the halter itself.
- Call Flex if you need help. 888-401-9101 or, better yet, email him a few photos [email protected]


